
3G Protege5 : Front Strut and Spring Removal / Install

Thread Starter
Spam Czar!!
Joined: Aug 2004
Posts: 2,315
From: Cedar Falls, Iowa

3G Protege5 : Front Strut and Spring Removal / Install
This tutorial should hopefully help you install front struts and springs on a Protege5 as well as troubleshoot problems with the install. The install time may vary from 2-3 hours to 12 hours if all your bolts are seized up. So be prepared for the worst case scenario if you live in a harsh climate where rust is known to dominate your world.
Tools you will need:
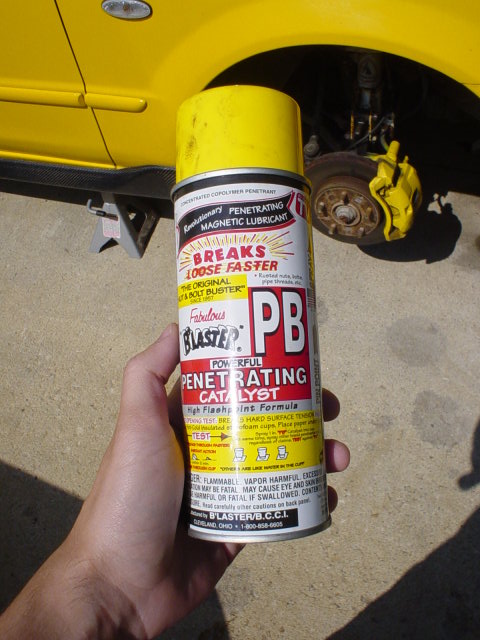
-PB Blaster (lots & lots of PB..)
-Big *** breaker bar (�” drive) or hollow steel pipe
-Sockets & Wrenches in 12, 14, 17, & 19mm
-Pliers
-Jack stands (very important!!)
-Spring Compressor
-Optional but really useful, compressor with impact gun, air wrench, air drill (I didn't have these so you'll be alright if you don't have them)
Step 1:
I suggest that you do this first step the night before you plan doing all the work, so you can give the PB Blaster time to soak into the bolts.
Start by jacking up the car and putting it on jack stands. I only had two, so I did the front first then the rear. Take off the wheels and set them aside somewhere. Get out your trusty PB and spray the hell out of every bolt you see.
Step 2:
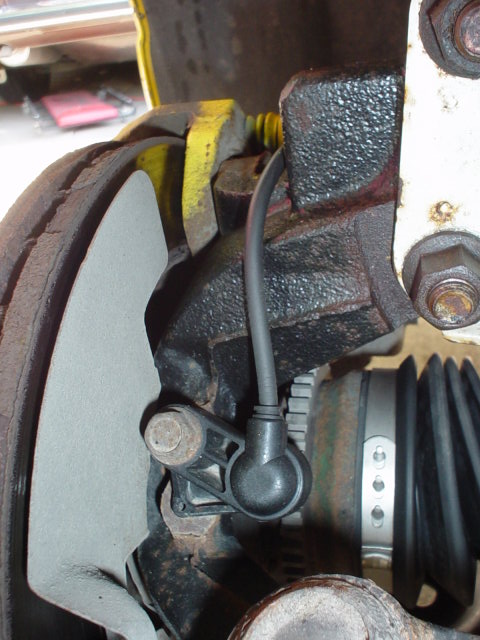
The following morning/afternoon you should be ready to attempt removing everything so get all your tools ready. First of all you will need to remove the ABS sensor and set it aside so it doesn't get damaged (they're not cheap to replace). Using a 12mm socket you should be able to remove it without any major difficulties. Once the bolt is out you will need to gently wiggle out the sensor (it has a little plastic pin next to the bolt that can break easily so be gentle).
Step 3:
Once the ABS sensor is in a safe spot, you will need to focus on the brake & ABS line clips. The ABS clip can be removed using a 12mm socket and the brake line clip just slides out. Get a pair of pliers and just wiggle it out.
Step 4:
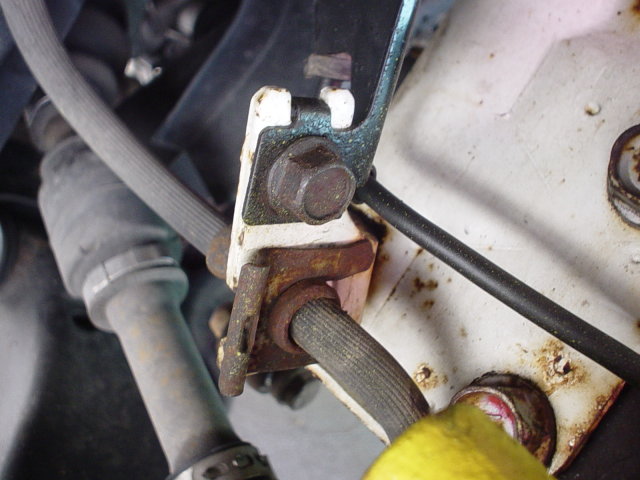
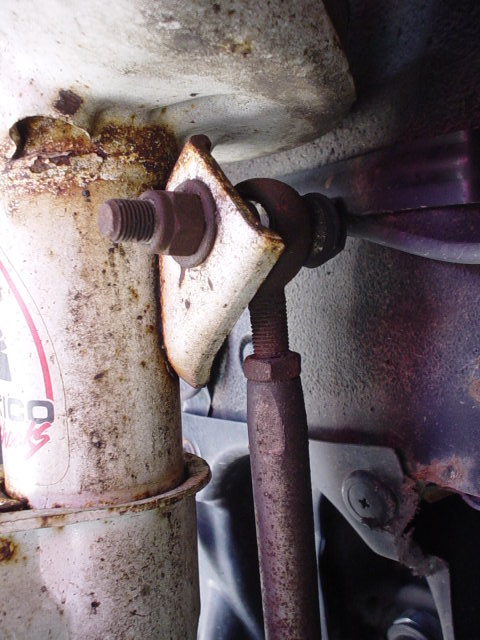
Next up I suggest you break loose the endlink. You only need to remove the top part, so don't hassle yourself with the bottom. Also, my endlinks are made by AWR so your stock ones are likely to be a lot different AND much much much harder to remove. You will need a 14mm socket & wrench, lots of patience, and your best swearing vocabulary handy.
Step 5:
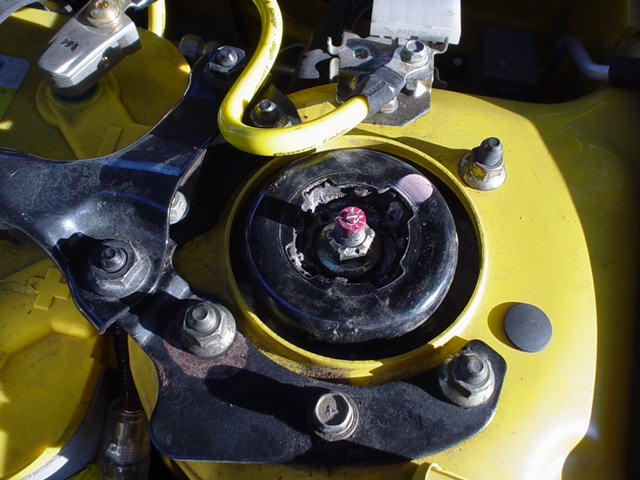
After the endlink is removed you'll need to raise the hood and break some stuff loose at the top end of the strut. I highly suggest that you at least attempt to break loose the center nut at the top of the strut using a 17mm socket. It is MUCH easier to do with the strut still installed than when it's completely removed. Just break it loose though, do NOT remove all the way. Then feel free to remove the four 14mm nuts surrounding the center.
*NOTE*
Remember which way the pink/white dot is facing at the top of strut. It is very important that you reinstall the top strut mount in the same orientation.
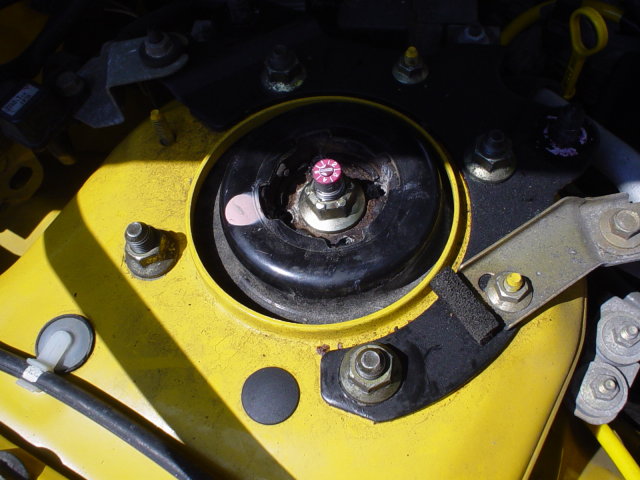
Tools you will need:
-PB Blaster (lots & lots of PB..)
-Big *** breaker bar (�” drive) or hollow steel pipe
-Sockets & Wrenches in 12, 14, 17, & 19mm
-Pliers
-Jack stands (very important!!)
-Spring Compressor
-Optional but really useful, compressor with impact gun, air wrench, air drill (I didn't have these so you'll be alright if you don't have them)
Step 1:
I suggest that you do this first step the night before you plan doing all the work, so you can give the PB Blaster time to soak into the bolts.
Start by jacking up the car and putting it on jack stands. I only had two, so I did the front first then the rear. Take off the wheels and set them aside somewhere. Get out your trusty PB and spray the hell out of every bolt you see.
Step 2:
The following morning/afternoon you should be ready to attempt removing everything so get all your tools ready. First of all you will need to remove the ABS sensor and set it aside so it doesn't get damaged (they're not cheap to replace). Using a 12mm socket you should be able to remove it without any major difficulties. Once the bolt is out you will need to gently wiggle out the sensor (it has a little plastic pin next to the bolt that can break easily so be gentle).
Step 3:
Once the ABS sensor is in a safe spot, you will need to focus on the brake & ABS line clips. The ABS clip can be removed using a 12mm socket and the brake line clip just slides out. Get a pair of pliers and just wiggle it out.
Step 4:
Next up I suggest you break loose the endlink. You only need to remove the top part, so don't hassle yourself with the bottom. Also, my endlinks are made by AWR so your stock ones are likely to be a lot different AND much much much harder to remove. You will need a 14mm socket & wrench, lots of patience, and your best swearing vocabulary handy.
Step 5:
After the endlink is removed you'll need to raise the hood and break some stuff loose at the top end of the strut. I highly suggest that you at least attempt to break loose the center nut at the top of the strut using a 17mm socket. It is MUCH easier to do with the strut still installed than when it's completely removed. Just break it loose though, do NOT remove all the way. Then feel free to remove the four 14mm nuts surrounding the center.
*NOTE*
Remember which way the pink/white dot is facing at the top of strut. It is very important that you reinstall the top strut mount in the same orientation.
Last edited by KrayzieFox; Aug 1, 2007 at 05:32 PM.
Thread Starter
Spam Czar!!
Joined: Aug 2004
Posts: 2,315
From: Cedar Falls, Iowa
Step 6:
Now that all the little nuts & bolts are off, it's time for the big bad strut bolts. You'll need a 17mm wrench on one side, 17mm socket on the other and either a really big *** breaker bar or a hollow steel pole to use a lever. Place the wrench on the left side so it's touching the brake rotor, and use as much leverage as you can on the other side to break these bolts loose. Just take it easy and they'll give in sooner or later, you don't wanna put TOO much pressure at once and break them in half.
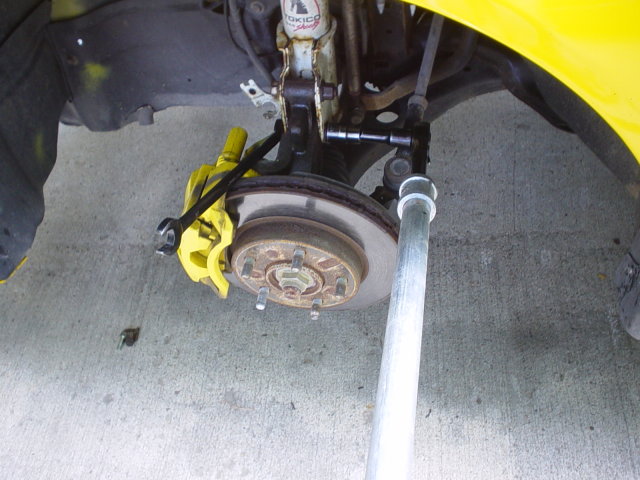
Step 7:
Once the two main strut bolts are out, you can safely remove the strut assembly. Everything should come out in one piece, with the strut & spring still together.

Step 8:
Get out your spring compressor, and place them on each side of the spring. It's very important that you compress the spring before attempting to remove the top strut mount as you could potentially hurt yourself quite badly if you don't. I did about 10 turns on each side three times or so, and that gave me enough compression to safely remove everything.

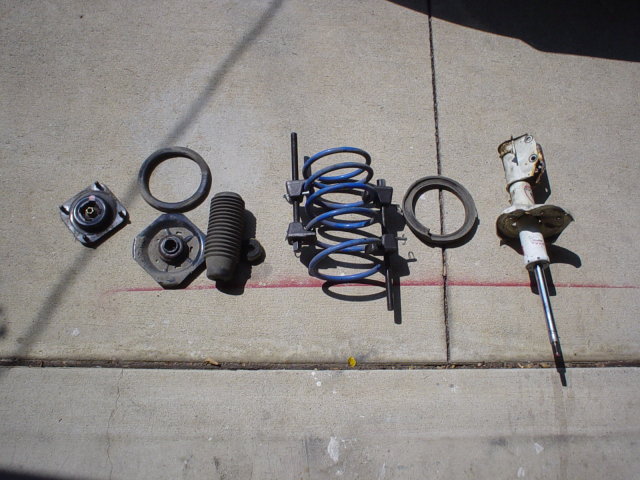
Step 9:
With the spring now compressed you will need to once again use a 17mm socket to remove the center nut on top of the strut. Remove the upper strut mount, dust boot & bump stop, spring, and lower strut mount. You should be looking at something like this..
Now that all the little nuts & bolts are off, it's time for the big bad strut bolts. You'll need a 17mm wrench on one side, 17mm socket on the other and either a really big *** breaker bar or a hollow steel pole to use a lever. Place the wrench on the left side so it's touching the brake rotor, and use as much leverage as you can on the other side to break these bolts loose. Just take it easy and they'll give in sooner or later, you don't wanna put TOO much pressure at once and break them in half.
Step 7:
Once the two main strut bolts are out, you can safely remove the strut assembly. Everything should come out in one piece, with the strut & spring still together.
Step 8:
Get out your spring compressor, and place them on each side of the spring. It's very important that you compress the spring before attempting to remove the top strut mount as you could potentially hurt yourself quite badly if you don't. I did about 10 turns on each side three times or so, and that gave me enough compression to safely remove everything.
Step 9:
With the spring now compressed you will need to once again use a 17mm socket to remove the center nut on top of the strut. Remove the upper strut mount, dust boot & bump stop, spring, and lower strut mount. You should be looking at something like this..
Last edited by KrayzieFox; Aug 1, 2007 at 05:26 PM.
Thread Starter
Spam Czar!!
Joined: Aug 2004
Posts: 2,315
From: Cedar Falls, Iowa
Step 10:
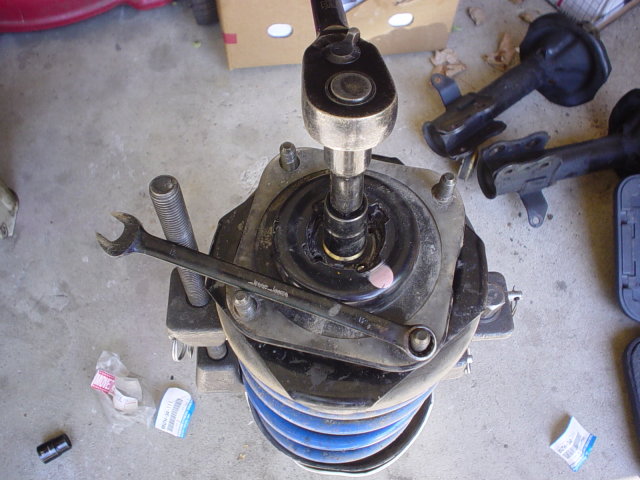
Put all the pieces of the strut assembly back together and feel free to upgrade your struts and/or springs. You may also (optional) use new strut mounts as well, but my old ones were in pretty good shape so I only replaced the strut with a newer one.
Keep in mind that you still want the spring compressors on the spring, so do not remove them just yet. Also, if you are having problems tightening the center nut just stick a wrench in there and the top will quit spinning.
Step 11:
*IMPORTANT*
As mentioned previously, make sure that you orient the top of strut in the same direction as it was before you removed it. The pink/white dot should be in the same location as before. Secure the top of the strut by reinstalling the four 14mm nuts but don't worry about tightening them too much just yet.
Step 12:
Secure the bottom of the strut by reinstalling the two 17mm main strut bolts, top endlink bolt, ABS sensor & brake line clip. Also remember to use the proper torque specs on each bolt so you don't break anything.

Step 13:
This step is kind of optional but not a bad idea. Push up on the strut assembly by using a jack so that the strut gets pushed as far up as possible. This way you are able to secure the top 14mm nuts properly, or you can just do it when you get the car back on the ground .. either way achieves the same result.

And now you're done. Make sure everything is tightened properly and you don't have any extra/missing pieces. Take the car for a spin around the block to make sure there aren't any funny noises or vibrations and enjoy your new struts/springs
Put all the pieces of the strut assembly back together and feel free to upgrade your struts and/or springs. You may also (optional) use new strut mounts as well, but my old ones were in pretty good shape so I only replaced the strut with a newer one.
Keep in mind that you still want the spring compressors on the spring, so do not remove them just yet. Also, if you are having problems tightening the center nut just stick a wrench in there and the top will quit spinning.
Step 11:
*IMPORTANT*
As mentioned previously, make sure that you orient the top of strut in the same direction as it was before you removed it. The pink/white dot should be in the same location as before. Secure the top of the strut by reinstalling the four 14mm nuts but don't worry about tightening them too much just yet.
Step 12:
Secure the bottom of the strut by reinstalling the two 17mm main strut bolts, top endlink bolt, ABS sensor & brake line clip. Also remember to use the proper torque specs on each bolt so you don't break anything.
Step 13:
This step is kind of optional but not a bad idea. Push up on the strut assembly by using a jack so that the strut gets pushed as far up as possible. This way you are able to secure the top 14mm nuts properly, or you can just do it when you get the car back on the ground .. either way achieves the same result.
And now you're done. Make sure everything is tightened properly and you don't have any extra/missing pieces. Take the car for a spin around the block to make sure there aren't any funny noises or vibrations and enjoy your new struts/springs
Last edited by KrayzieFox; Aug 1, 2007 at 06:36 PM.
Tech/How-To/Northeast Mod
Joined: Feb 2006
Posts: 2,517
From: Rochester, New York
Also note that if you can't get the top bolt undone on any of the endlinks, you can just undo the bottom and have the endlinks hanging off the strut assembly while you work on stuff. Works just as well

Thread
Thread Starter
Forum
Replies
Last Post
Matty Mooling
3rd gen Suspension/Brakes
7
Sep 27, 2005 08:18 AM
leungwingkei
3rd gen Suspension/Brakes
2
Mar 18, 2003 09:39 PM
Currently Active Users Viewing This Thread: 1 (0 members and 1 guests)