
3g Protege: Thermostat Replacement for 2.0 FS-DE w/ pictures


Thread Starter
Registered User
Joined: Jun 2002
Posts: 195
From: rockford,il

3g Protege: Thermostat Replacement for 2.0 FS-DE w/ pictures
okay first off id like to say that this might not be the best how-to exactly...but searching around i found just directions from http://protege5.ugly.net/....under the engine section(sub category cooling system01-12..once your in that section youll want sections 01-12-5 and 01-12-6). but these were very helpful since im not the most mechanically inclined person which is the reason for this post. i figured hell if i can do it with just directions maybe i could take some pictures and make it a little easier for the next person. when it comes down to it this is a very easy fix that anyone should be able to do. well lets get started.
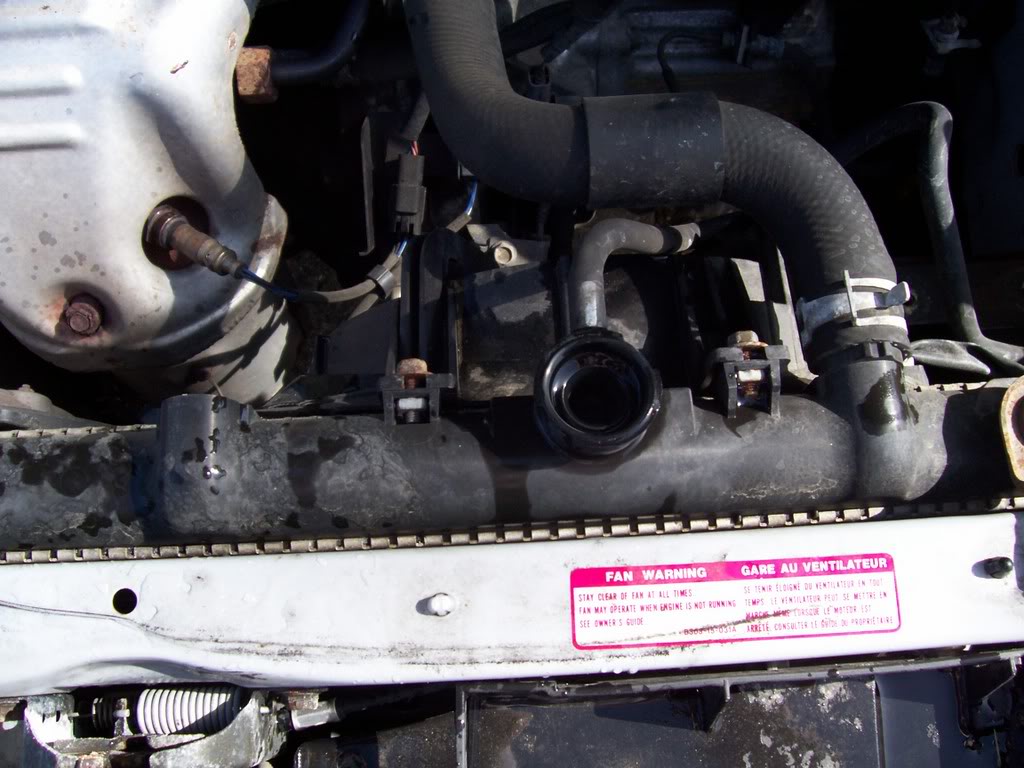
first off.....i drained the radiator and flushed it with the hose. very simple procedure. a little messy for me due to i had no clue what i was doing. first pic is obvious radiator cap off.
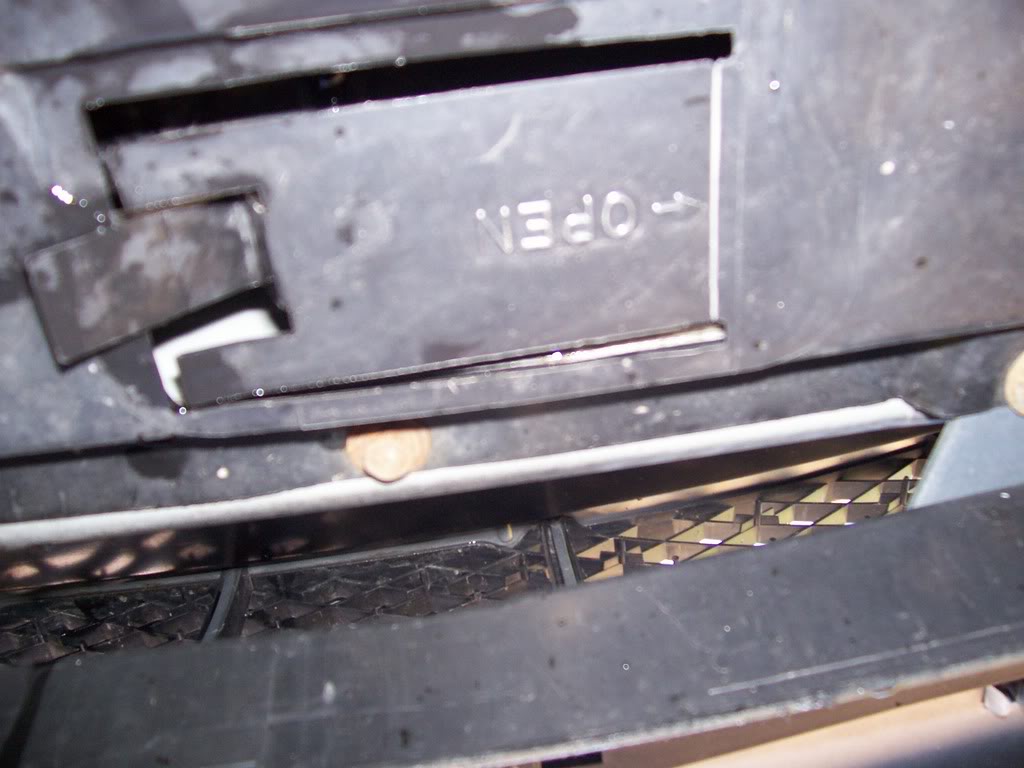
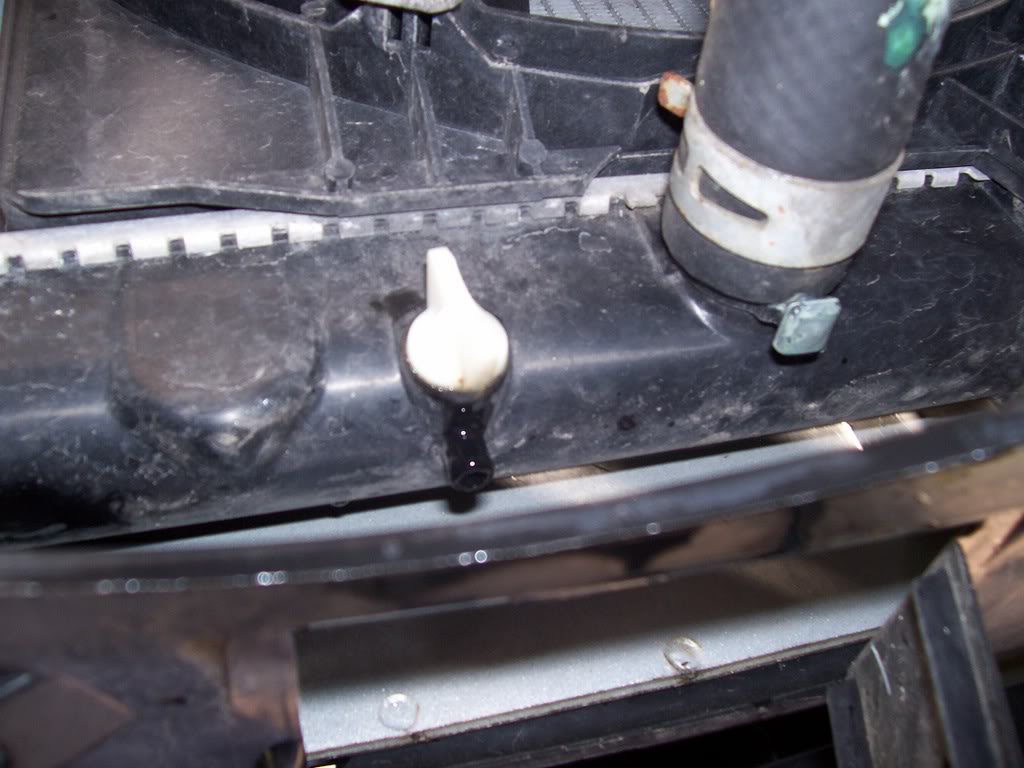
second and third pic is the location fo the drain plug and the plug pulled. under the car you have the plastic cover. just pull that down and gthe plug is right there. as you can see in the third pic the cover down and this angle is further back taking a pic just above the splash gaurd.
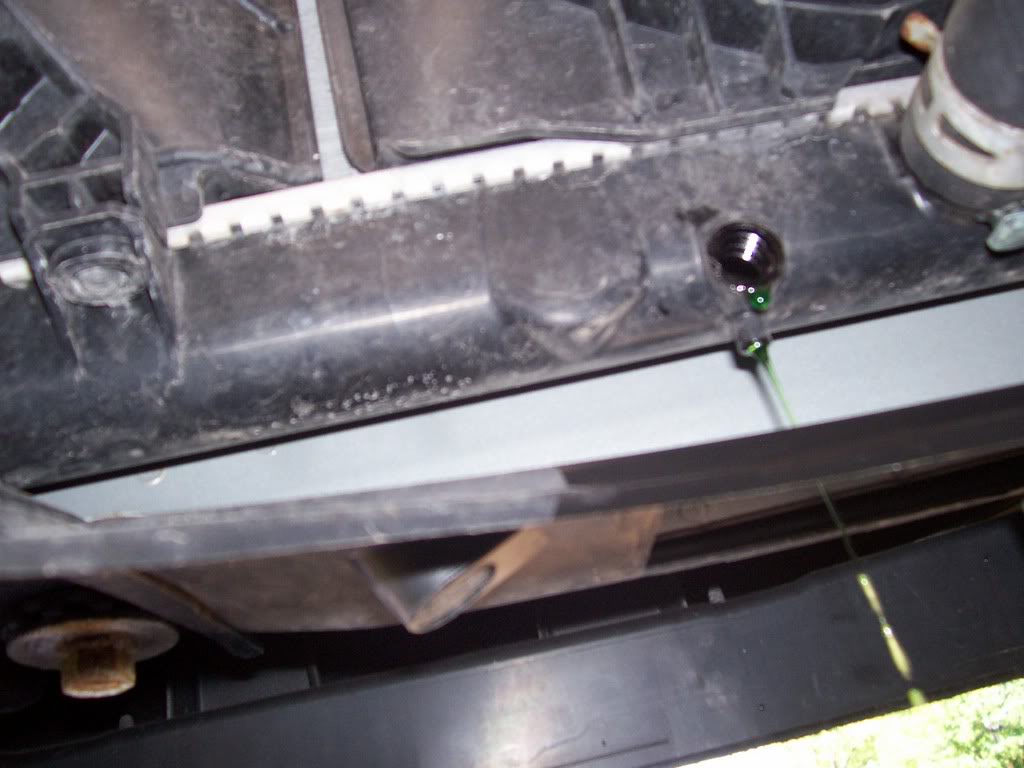
now the next pic shows the plug pulled and the sytem almost drained. now ill warn some people...i pulled the plug all the way out right away. due to the splash gauard being there it ran down into the bucket and also down the splash gaurd missing the bucket completely.
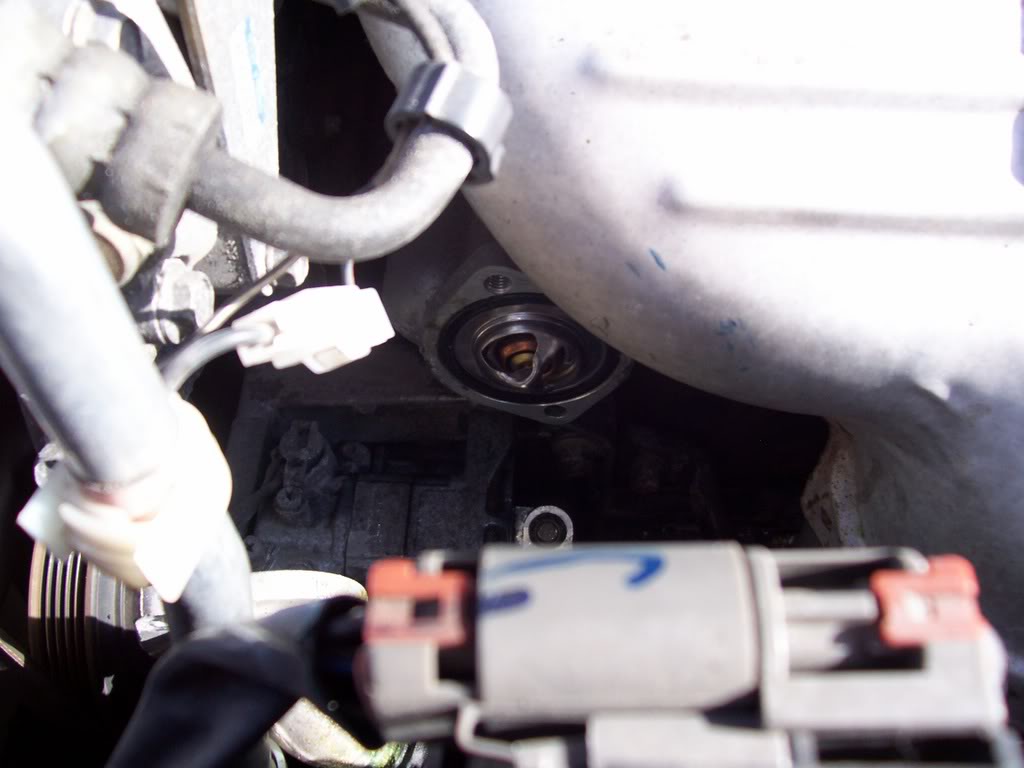
okay now that the radiator was drained i put the plug back in and proceeded to locate the thermostat. this is where the directions came in handy for myself. pictured below is the lower radiator hose in which the thermostat is housed in or better yet the piece that the hose is connected to that the t-stat in located in. now this is just left of the header just under it.
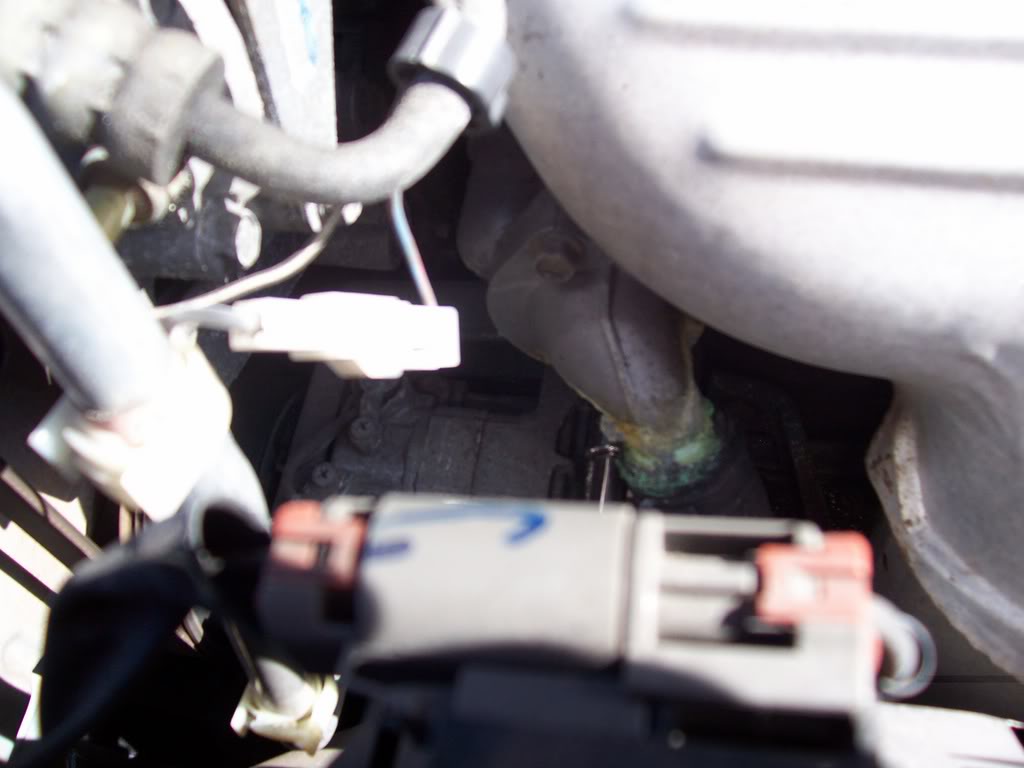
you then unbolt the housing to get to the t-stat. now i dont remeber the exact size ratchet i used to get it off but ill go back out and re-edit this when i get the size.
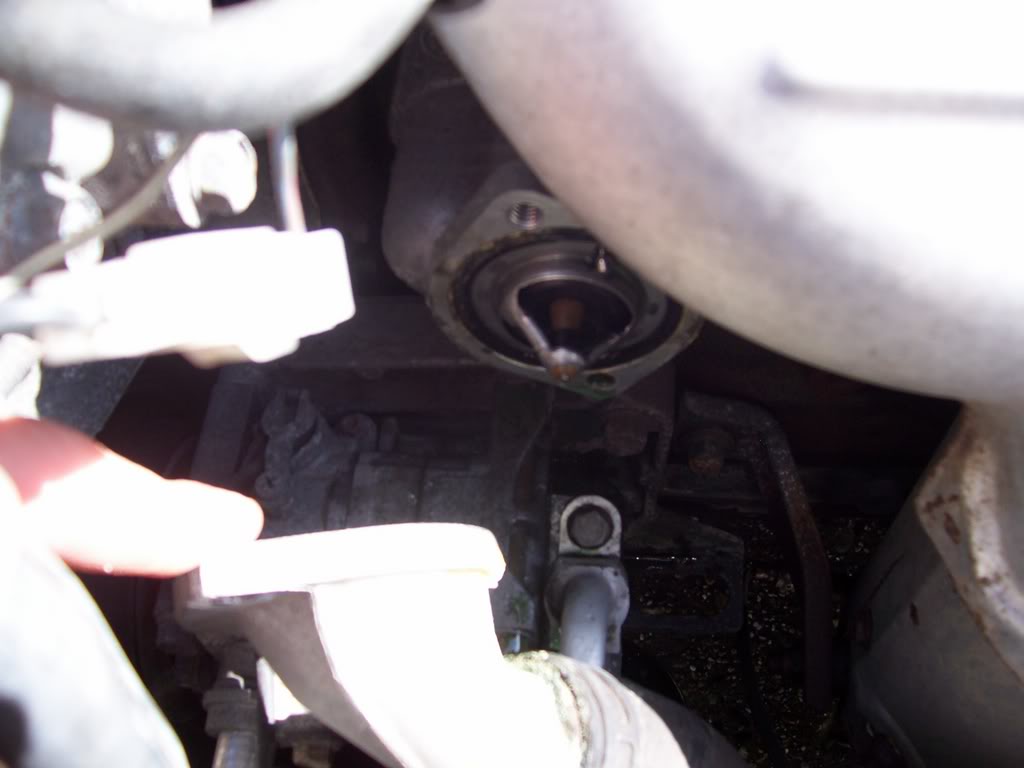
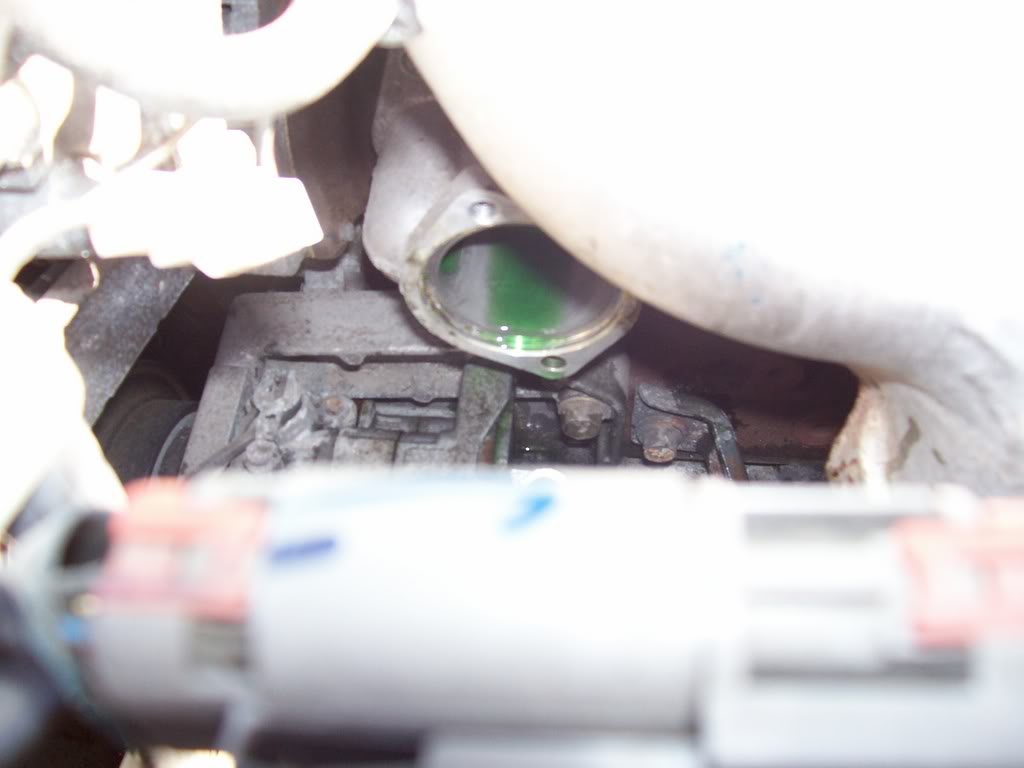
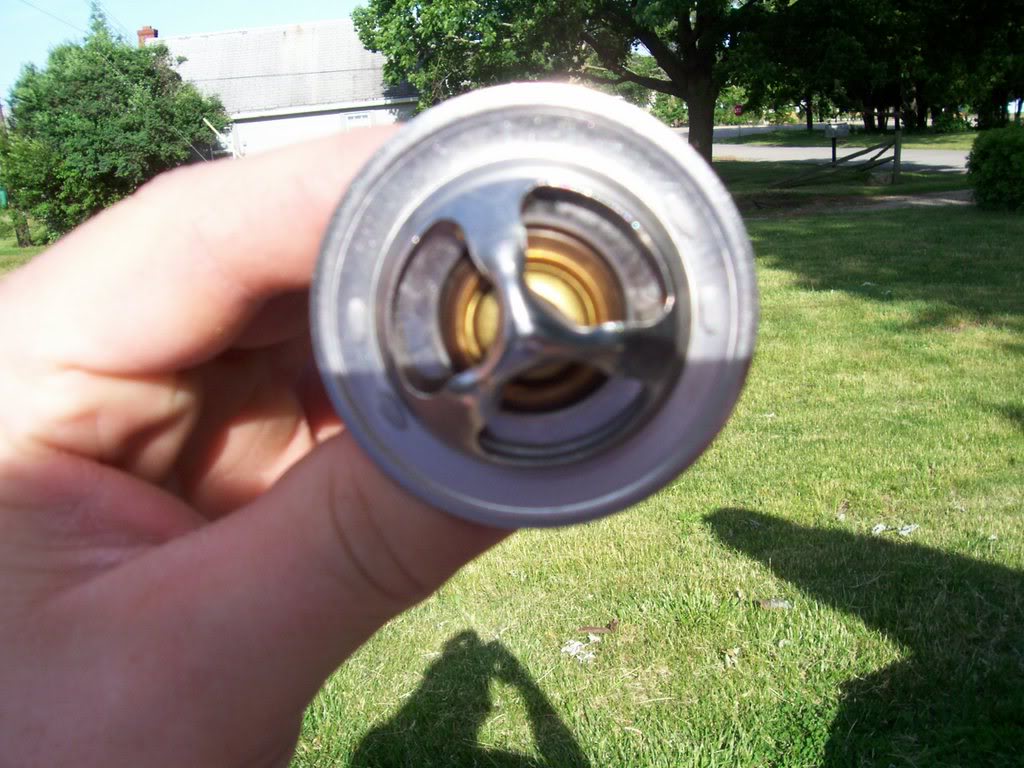
the next pic is with the t-stat removed. now this is where it got really messy. due to the t-stat being stuck closed it took a little prying to get out. i used a screwdriver myself..once the t-stat popped out i had a lot of coolant come pooring out of the block. just hosed down the driveway and went about my business.
now the next pic shows the t-stat out and the rubber gasket that was around the edge of it. i just took that off and re-used it seemed to be fine...might want to check yours. now the little "bump" on the edge of that gasket is supposed to be in line with the jiggle pin when you put in the new t-stat. another thing that was very hlepful from the directions.
now with the new t-stat part number 15048(duralast part) the jiggle pin is located under the metal pieces on top of the t-stat. sorry some pics arent the greatest. but youll see it when you get the part.
now match up the gasket and the "bump" to the jiggle pin. now you must aslo line them up on the housing. there is a spot on the housing where the "bump" must be placed. make sure you have the t-stat sitting in its proper place.
first off.....i drained the radiator and flushed it with the hose. very simple procedure. a little messy for me due to i had no clue what i was doing. first pic is obvious radiator cap off.
second and third pic is the location fo the drain plug and the plug pulled. under the car you have the plastic cover. just pull that down and gthe plug is right there. as you can see in the third pic the cover down and this angle is further back taking a pic just above the splash gaurd.
now the next pic shows the plug pulled and the sytem almost drained. now ill warn some people...i pulled the plug all the way out right away. due to the splash gauard being there it ran down into the bucket and also down the splash gaurd missing the bucket completely.
okay now that the radiator was drained i put the plug back in and proceeded to locate the thermostat. this is where the directions came in handy for myself. pictured below is the lower radiator hose in which the thermostat is housed in or better yet the piece that the hose is connected to that the t-stat in located in. now this is just left of the header just under it.
you then unbolt the housing to get to the t-stat. now i dont remeber the exact size ratchet i used to get it off but ill go back out and re-edit this when i get the size.
the next pic is with the t-stat removed. now this is where it got really messy. due to the t-stat being stuck closed it took a little prying to get out. i used a screwdriver myself..once the t-stat popped out i had a lot of coolant come pooring out of the block. just hosed down the driveway and went about my business.
now the next pic shows the t-stat out and the rubber gasket that was around the edge of it. i just took that off and re-used it seemed to be fine...might want to check yours. now the little "bump" on the edge of that gasket is supposed to be in line with the jiggle pin when you put in the new t-stat. another thing that was very hlepful from the directions.
now with the new t-stat part number 15048(duralast part) the jiggle pin is located under the metal pieces on top of the t-stat. sorry some pics arent the greatest. but youll see it when you get the part.
now match up the gasket and the "bump" to the jiggle pin. now you must aslo line them up on the housing. there is a spot on the housing where the "bump" must be placed. make sure you have the t-stat sitting in its proper place.
Last edited by MyLowPro5; Jun 11, 2007 at 04:03 PM.
Thread Starter
Registered User
Joined: Jun 2002
Posts: 195
From: rockford,il
now all you do is bolt the housing back up and refill the car with coolant. follow directions and check for any leaks. i also ran the car like the directions stated to make sure the t-stat was in properly and the car wasnt overheating.

this pretty much sums up the install. it probably took me alot longer to do than it should have. but like i said i dont fix cars at all and took my time so i didnt mess it up. since this i havent had any problems with the car. total price came to about 30 bucks by the time i bought the t-stat and coolant to fill it back up.
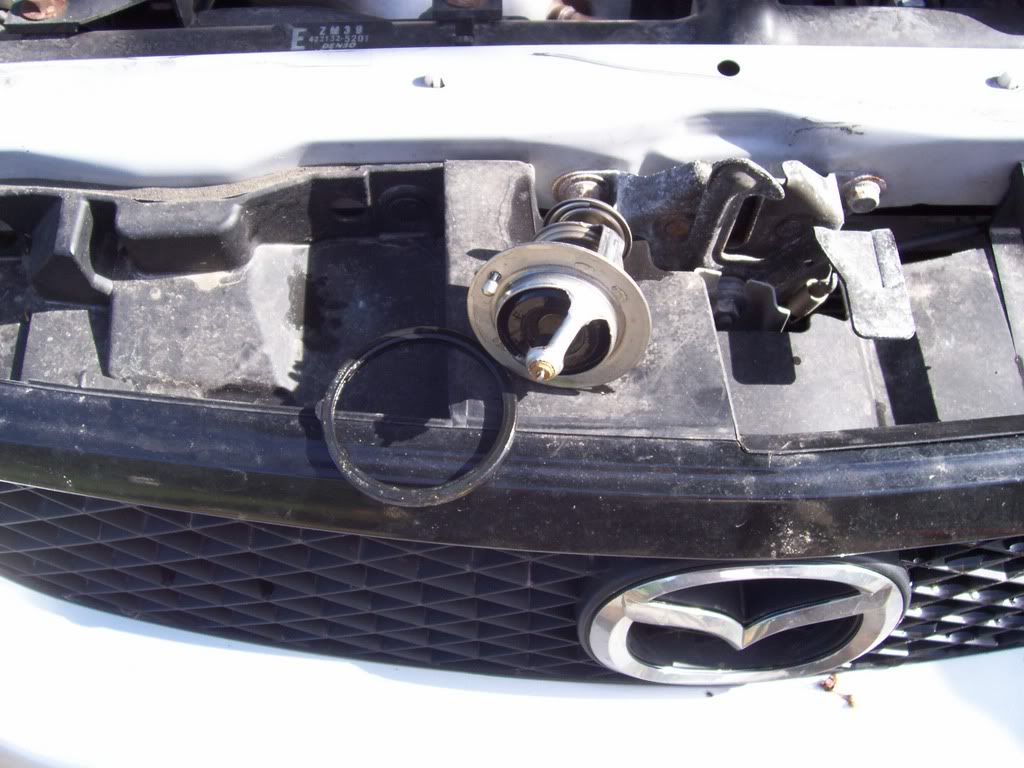
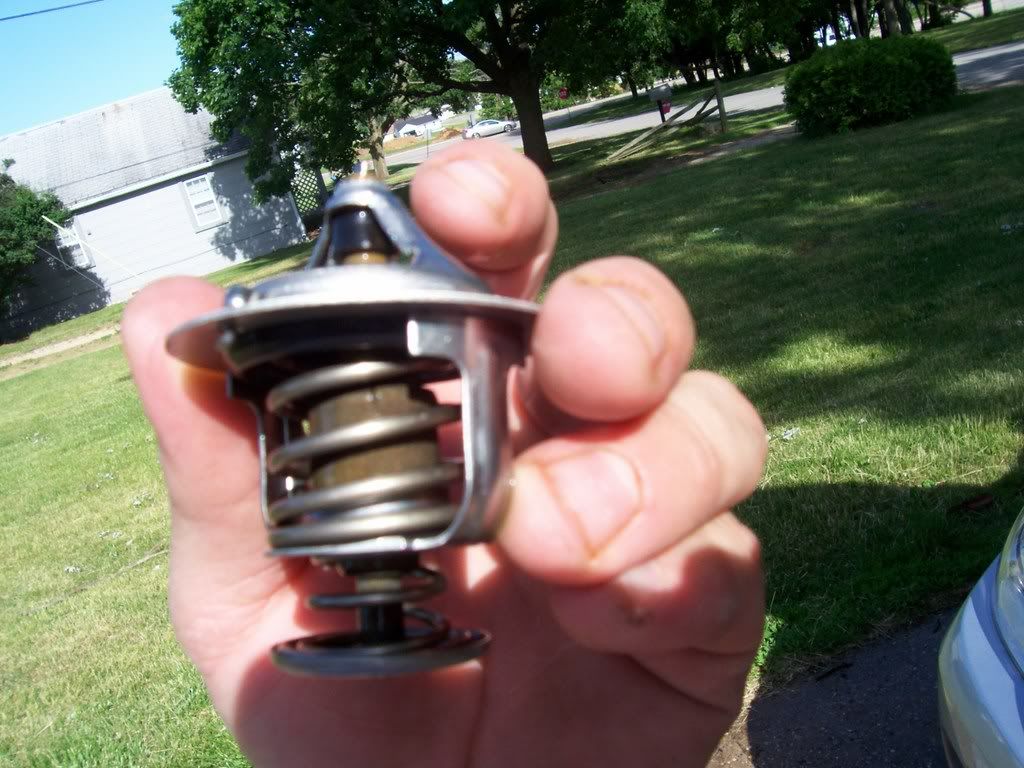
here are some pics of the bad t-stat. at the top of the spring you can somewhat see little hairline cracks.
other than that thats the only thing i could see wrong with it.

second view...crappy but you can see it a little.

the car up on the stands...lol

well hopefully this will help someone. i tried to be as thorough as possible. just tryin to help out my fellow board members.
thanks
james
this pretty much sums up the install. it probably took me alot longer to do than it should have. but like i said i dont fix cars at all and took my time so i didnt mess it up. since this i havent had any problems with the car. total price came to about 30 bucks by the time i bought the t-stat and coolant to fill it back up.
here are some pics of the bad t-stat. at the top of the spring you can somewhat see little hairline cracks.
other than that thats the only thing i could see wrong with it.
second view...crappy but you can see it a little.
the car up on the stands...lol
well hopefully this will help someone. i tried to be as thorough as possible. just tryin to help out my fellow board members.
thanks
james
Tech/How-To/Northeast Mod
Joined: Feb 2006
Posts: 2,517
From: Rochester, New York
can a mod of this section move this thread into the section I mod (tech/how-to) so I can get it with the others?
great how-to by the way. I can't see the pictures while at work but I can still tell that you did a thorough job.
People, when he says not to take the drain plug all the way out take him VERY seriously. Just turn the plug until it starts pouring out slowly, and don't go any farther. You'll regret it if you do, I know I do each time I get impatient and pull it out the rest of the way haha.
Thread Starter
Registered User
Joined: Jun 2002
Posts: 195
From: rockford,il
thanks kansei...yes like i said...for not knowing what i was doing i figured id warn people about the plug. i would have put it in the how-to section but i wanted it to get approval first that way people werent getting bunk information.
james
james
Thread Starter
Registered User
Joined: Jun 2002
Posts: 195
From: rockford,il
just checked the directions on http://protege5.ugly.net/ and it is called a jiggle pin. the "bump" i refer to is called the "projection". just to clarify that. yes i found it funny myself.
Registered User
Joined: Jan 2007
Posts: 438
From: Southern Ontario
Good little write up. Did you address your bad lower hose issue. Judging from the corrosion built up on the housing you have a bad hose as well. Did you have any problems burping the air out of it?
Thread Starter
Registered User
Joined: Jun 2002
Posts: 195
From: rockford,il
no didnt replace the hose at all. its been like that for awhile now...with no problems. probably should have but owell. as far as any air....i drained the coolant....ran water through the radiator...popped the t-stat out. replaced and filled back up. no air that i can speak of. but i really didnt know what the hell i was doing when i did this so....all and all to have it done with no more issues..... in my book. now i just gotta get my damn motor mounts in. i dont usually work on my own car cuz im not very mechanically inclined.
james
in my book. now i just gotta get my damn motor mounts in. i dont usually work on my own car cuz im not very mechanically inclined.james

Registered User
Joined: Jan 2013
Posts: 1
Sorry to bring up a really old thread... but this was the first google result for "2002 mazda protege thermostat replacement", so I figured I would add something that could help.
There are two different thermostats listed for the 2.0L engine, at least at advance auto parts. The proper one is the one with the gasket built into it and the little jiggle pin. The improper one does not have either, so as long as you know what you're looking for, it's easy to tell the difference. Had to go back to advance after pulling mine out and trade it in for the proper one, hoping to save someone else the extra trip
There are two different thermostats listed for the 2.0L engine, at least at advance auto parts. The proper one is the one with the gasket built into it and the little jiggle pin. The improper one does not have either, so as long as you know what you're looking for, it's easy to tell the difference. Had to go back to advance after pulling mine out and trade it in for the proper one, hoping to save someone else the extra trip

Registered User
Joined: Jun 2013
Posts: 1
i have a similar problem i think.
my girlfriend has had this car for awhile and she has had the engine replaced a while ago and the radiator replaced in 10/2012. now i have never seen her car over heat but she tells me it happens a lot when she drives. so i checked the fluid and all the hoses for leaks or discoloring could not see anything. so i think its the thermostat just wanted to see if you guys thought the same thing?
my girlfriend has had this car for awhile and she has had the engine replaced a while ago and the radiator replaced in 10/2012. now i have never seen her car over heat but she tells me it happens a lot when she drives. so i checked the fluid and all the hoses for leaks or discoloring could not see anything. so i think its the thermostat just wanted to see if you guys thought the same thing?

Registered User
Joined: Apr 2016
Posts: 1
now all you do is bolt the housing back up and refill the car with coolant. follow directions and check for any leaks. i also ran the car like the directions stated to make sure the t-stat was in properly and the car wasnt overheating.

this pretty much sums up the install. it probably took me alot longer to do than it should have. but like i said i dont fix cars at all and took my time so i didnt mess it up. since this i havent had any problems with the car. total price came to about 30 bucks by the time i bought the t-stat and coolant to fill it back up.
here are some pics of the bad t-stat. at the top of the spring you can somewhat see little hairline cracks.
other than that thats the only thing i could see wrong with it.

second view...crappy but you can see it a little.
the car up on the stands...lol

well hopefully this will help someone. i tried to be as thorough as possible. just tryin to help out my fellow board members.
thanks
james
this pretty much sums up the install. it probably took me alot longer to do than it should have. but like i said i dont fix cars at all and took my time so i didnt mess it up. since this i havent had any problems with the car. total price came to about 30 bucks by the time i bought the t-stat and coolant to fill it back up.
here are some pics of the bad t-stat. at the top of the spring you can somewhat see little hairline cracks.
other than that thats the only thing i could see wrong with it.
second view...crappy but you can see it a little.
the car up on the stands...lol
well hopefully this will help someone. i tried to be as thorough as possible. just tryin to help out my fellow board members.
thanks
james
thanks a ton for taking the time to put this all together. I've been dealing with an overheating problem, and have looked in a lot of places for solid answers, but this was the most thorough and thought out
you rule!

Thread
Thread Starter
Forum
Replies
Last Post
03, blocks, bucket, coolant, forums, install, mazda, mazdaspeed, problems, protege, protege5, radiator, replace, replacement, thermostat
Currently Active Users Viewing This Thread: 1 (0 members and 1 guests)